Category Archives: necklaces

Egg Pendant


IMG_2492

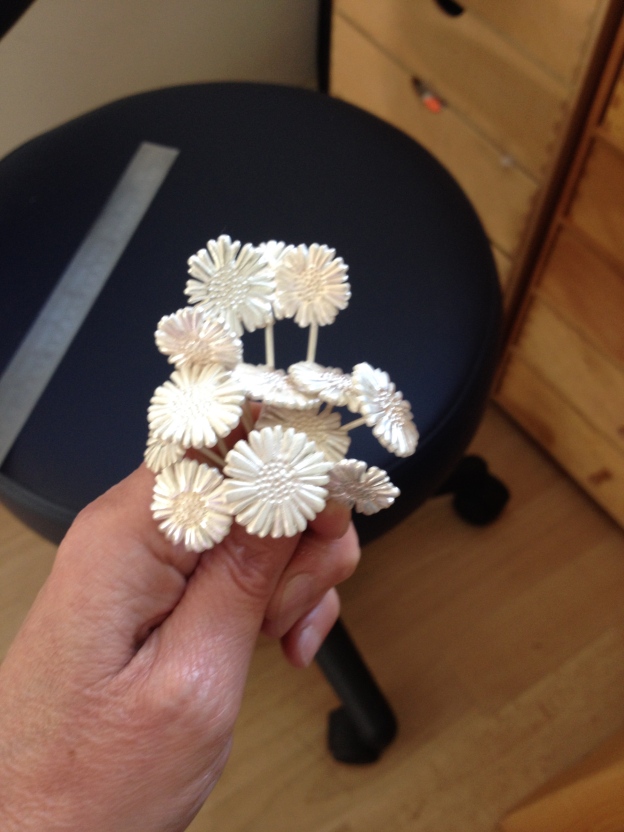
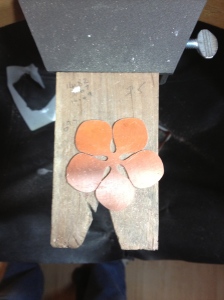
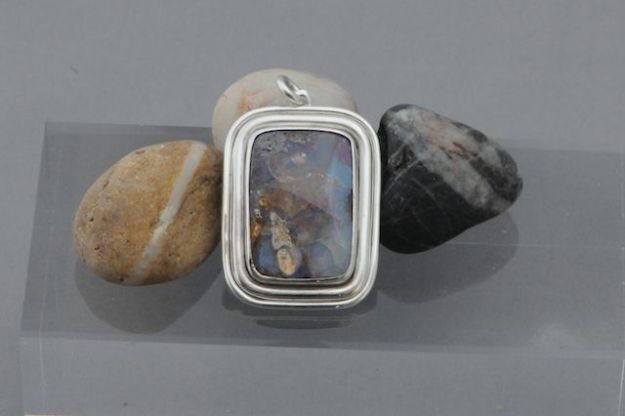
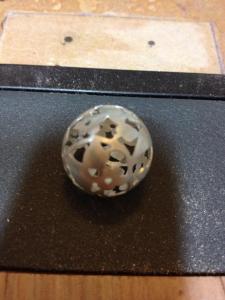
I have rather lovely Boulder Opal which was brought back from Australia for me.  This isn’t the best picture of the Opal.  It’s much more blue.

IMG_2386

It reminds me of a pool of water and I would like to capture the natural feel of the stone.  I want the piece to reflect the colours of the opal but at the same time cocoon it and keep it safe.  Those that know me will understand my reluctance to create an “organic’ piece of jewellery.  I have seen too many pieces which are called ‘organic’ to cover up shoddy workmanship and poor finishing.  I aim to have a finished piece that is neither of those things!

I decided I wanted to place the opal in an eggshell.  It would look like a little pool of water had gathered in the eggshell once the chick had flown.

To start with I had to make the eggshell.  I took a sheet of 0.8mm silver and cut an egg shape with a handle out of it.

IMG_2371
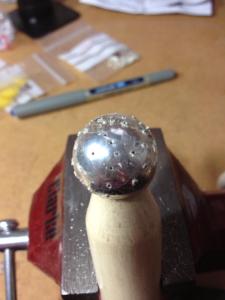
I planned on using a ‘spoon stake’ to form the egg.  I secured the stake in the big vice, laid the silver over the top and started hammering it.  I started around the edges and then moved into the centre.  I pretty soon discovered that the ‘handle’ was not only unnecessary but a blinking nuisance!  I cut it off!  You can see the shape starting to form.

IMG_2375

Before too long the metal became really hard and difficult to work so I annealed it.  Annealing is the process of softening the metal using heat.  The silver is heated up to a straw colour and then pickled in weak sulphuric acid solution to remove the traces of copper oxide that form on the surface

IMG_2377 IMG_2378

Then back to the shaping, more hammering, more annealing, more pickling. Oh, and cups of tea while pickling.

Actually it’s too big.and still too shallow. I need to make it smaller and deeper. I didn’t really know how much the metal would stretch with forming so I erred on the side of caution.  Drew a line using a black sharpie and the sawed off the spare.

IMG_2380 IMG_2381

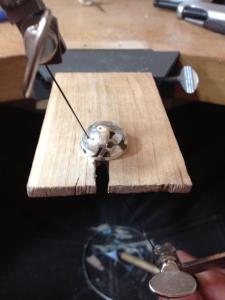
I used the doming block to deepen the bottom curve and then drew lines to resemble the cracked edges of the shell.  I plan to engrave the ‘cracks’ in the back of the shell when it’s finished.

IMG_2382 IMG_2383

I think the shaping’s done.. Time to make and add the bail.  I cut a short strip of 1mm sheet and bent it then soldered it.

IMG_2388 IMG_2389

I positioned the bail on the egg and soldered it in place – the wrong place!  It leans forward too much.  I need to do it again!

IMG_2390 IMG_2391

To remove the bail I held the bail itself in a the third hand. (Free standing tweezers) and heated it up.  The solder ran and the egg dropped off.  I repositioned it further up the egg.

IMG_2392 IMG_2393

That’s better, it hangs nicely now.  Just need to make the bezel to set the opal in. This was the point when i realised that the stone was really thick and didn’t lay flat.  Should have spotted this before.  Here’s the stone, side view laying on a flat file.  You can clearly see the curve on the lower surface and the thickness.Since the opal surface itself is actually quite thin I figured I could remove a lot of the brown rock at the back without harming the stone.  I found, by trial and error, the best way was to rub it over coarse sandpaper.  This had the effect of flattening the base and thinning the stone.

IMG_2384 IMG_2385

At this point I wrapped fine silver bezel strip round the stone, cut the strip, soldered it and formed it into the correct shape.  I needed to do some more thinning of the stone to get it to look right.

Ok, now I needed to figure out a way to get the opal to sit in the egg so it would reflect off the back and appear like a pool.  The egg still wasn’t really deep enough at the bottom so I needed to do more shaping.  This time I used my lead block and a small  hammer.  I think this is called a chasing hammer.  I made the lead block last summer by melting offcuts of lead flashing into an old loaf tin. I can assure you the loaf tin is no longer used for loaves!

IMG_2410

Lead is softer than silver, when the silver is struck it deforms down into the lead.  This is the reverse of the shaping I did over the stake.  I was able to deepen the base of the egg sufficiently to hold the opal in the bottom.  It’s really important to do lots of hand and tool and egg washing throughout the entire process.  I wouldn’t want to accidentally munch a biscuit laced with lead.

Finally got it to the right shape. I did a lot of admiring at this stage, just resting the opal in the egg and taking photos!

IMG_2413 IMG_2414

All this was well and good but I still hadn’t come up with a way to set the opal that wouldn’t leave a gap around the edge.  I decided to make a tight fitting little shelf that the bezel would sit on.  Again, more head scratching.  The inside of the egg wasn’t regular – because of this darned ‘organic’ concept and I was really stumped.

Finally – inspiration!  I would put some Fimo modelling clay in the base, press the opal into it, remove the stone and then bake it.  My theory was that the clay would form to the egg and I could then use it as a template to cut out a little shelf of silver.

IMG_2416 IMG_2417

Here it is after baking.  I need to trim off the excess and then I should have my template.

IMG_2418


After sanding down the Fimo clay I positioned it in the egg.  It seemed to fit quite well.  Only little gap.

IMG_2420


I sat the opal on the shelf to see if it looked ok.  Not bad.

IMG_2421


Now I needed to cut out a little sheet of silver to replace the Fimo.  I put the Fimo shape on a sheet and drew round it.  I made sure I marked which side was which otherwise I would be fiddling around for ages trying to work out which way up it went.

IMG_2422 IMG_2423 IMG_2424


It fitted reasonably well but wobbled around a lot sliding up and down and left and right.  I just couldn’t seem to get it so there wasn’t a gap around the edge.

IMG_2426 IMG_2427 IMG_2428

Time to make the bezel that will secure the opal.  I wrapped fine silver snugly around the stone to hold it in place.

Boulder opal being fitted with a bezel.

I wanted to get the bezel fitted to stabilise the little shelf.  I felt it was flexing as I tried to position it. I put the bezel in place on the shelf and soldered it.  That went ok!

IMG_2432 IMG_2433


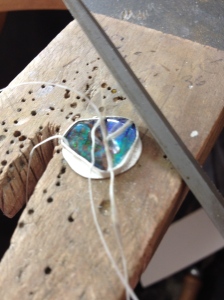
Test the fit by putting the stone in the setting.  I used dental floss to enable me to get it out again.  I really did need the floss, it fitted VERY snugly and needed quite a yank to get it out.  So much of a yank in fact that the opal shot out and vanished somewhere in the workshop.

IMG_2435

That would be a hands and knees search.  I finally found it underneath the recycling bags!


I kept trying to settle the shelf in the bottom of the egg but I just couldn’t get it to stay still.  Eventually I admitted defeat and soldered a little peg on the bottom of the bezel and drilled a corresponding hole in the bottom of the egg

IMG_2436 IMG_2437

To solder the shelf in place I knew I would need a lot of heat to get the egg up to temperature  I was worried that the bezel seams would run so I painted them with tippex.  Tippex stops solder flowing and will have the effect of protecting the seams on the bezel.


IMG_2439

I made a little ring of wire which I think will anchor the shelf into the egg.


IMG_2442

Here it is after soldering.

IMG_2443

After soldering I pickled the whole structure and then cut off the peg that was protruding from the bottom of the egg.

IMG_2444 IMG_2445

Just need to file off the excess solder from around the join.  The I trial fitted the opal – using the old dental floss trick again.


IMG_2446 IMG_2447


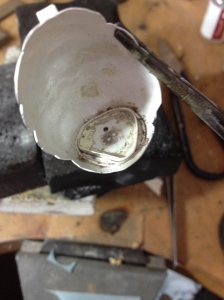
Ok. the stone fitted. Now to polish it.  Oh my days! the amount of fireplace was horrific.  I polished and polished and polished!  Then washed off the polish using an electric toothbrush and washing up liquid.


IMG_2452

OK. Still covered in firescale, it needed MORE  polishing.  The big bench polisher was fine for the outside but I needed to use the pendant motor fitted with a mop for the inside. At this stage I was worrying that the action of polishing would damage the delicate bezel. I fitted the stone into the bezel to support it and covered it with a bit of masking tape to protect the surface.


IMG_2456 IMG_2458 IMG_2459 IMG_2461 IMG_2462

It took forever and I got a very dirty face from all the polish flying around.  I think you can tell from the look of triumph that I finally got it all done!

IMG_2448


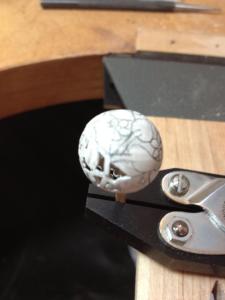
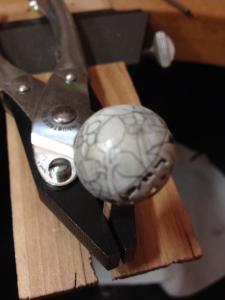
I wanted to make the back of the egg look as if it was cracked so I decided to use my newly acquired skill  (Ha ha – laughs in frustration – engraving is, I believe, a dark art and my attempts cannot be in any way described as skillful)

I needed to support the egg while engraving so I used Polymorph.  Polymorph is an amazing plastic which deforms with heat and the goes rock hard when cool.  I fitted a warm lump onto the bench mate and pressed the egg into it.  I could then use a graver to cut lines on the back that looked like cracks.  Its not clear in the photos – sorry.

IMG_2495 IMG_2496 IMG_2497


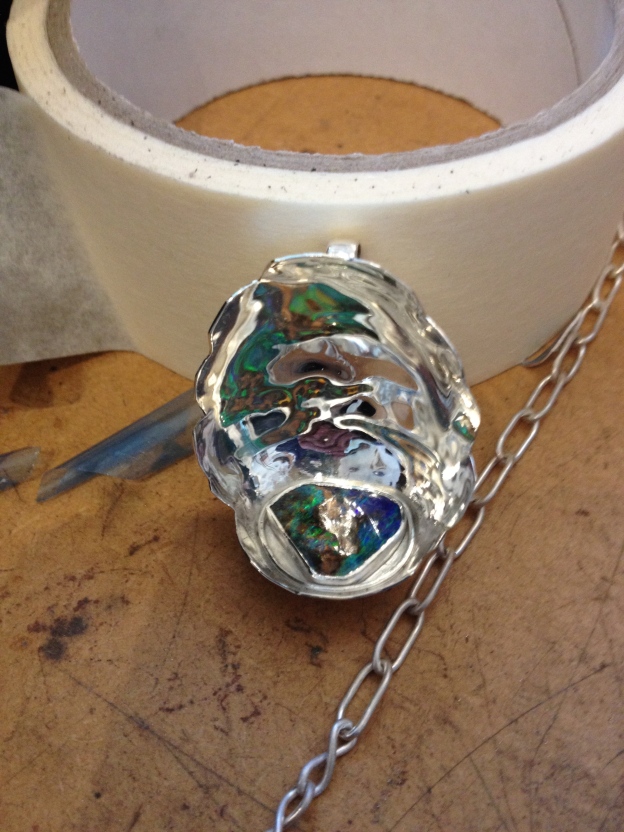
Finally I made a chain and a clasp and there we are. A little egg to hold an opal safe.

IMG_2492

DSC_9106


Daisy Chain Necklace. Making the Daisies up.

Still working on the Daisy chain.  Having cast the daisy heads I needed to finish them and then add the stalks. Castings always need cleaning up.  They have rough edges, sticky-out bits and generally the finish is nowhere near perfect.  Finishing castings would appear to be very time consuming.

Here’s one of the Daisy heads after I have filed, sanded and cleaned up the rough edges from the casting.  Once they were all cleaned up I polished them.  Its easier to polish them at this stage rather than when they have the stalks attached. I’ve put a picture of an unfinished casting next to the clean one so you can see the difference.

IMG_2297  IMG_2290


Next step is to add the stalks. I drilled a shallow hole in the back of the daisy.  This was to ensure the stalk went where I wanted it to go and to give a larger area for the solder to flow and create a join.

IMG_2298


The soldered the stalk in place.  I want a good firm joint here as these will be taking the weight of the necklace.

IMG_2299

I held the stalk in place using a ‘third hand’ tweezer, fluxed the area well and added some hard solder. The ‘third hand’ is a really simple tool which is a pair of tweezers attached to a heavy base.  The tool has two ‘ball’ joints which allow freedom to position the tweezers where you want them.

Look!! I got a bunch of Daisies!!

IMG_2300

Ridiculously pleased with this.

Now I need to bend the stalks to get them to link together.


Daisy Chain Necklace – Casting the Daisies.

Daisy

Daisy

I will admit to being slightly fixated with Daisies recently and in the absence of summer, I wanted to make a proper Daisy Chain necklace. Since I am greedy I wanted to make a long Daisy chain.  Remember the days spent sitting in the grass seeing how long you could make them? I reckon about 20 Daisies would do it.

This presented a problem.  Not only would the cost of new sheet silver be prohibitive but it would take ages to saw and file them all out.

So, brilliant idea number one.  Cast them using up my scrap pot. But how to do it? My knowledge of casting was limited to being vaguely sniffy about the mass produced cast items that proliferate in the shops.

CASTING THE DAISIES.

There are essentially two types of casting.  The ‘Lost Wax’ method and Delft Clay.  Lost wax was out of the question as it requires sacrificial wax models to be made which then melt as hot silver is forced into them using a centrifuge.  It would mean making 20 models, not to mention the cost of some pretty high tech machinery.  This is the commercial method used for such things as Pandora charms.

Delft Clay it would have to be, even that would mean buying the clay and the casting rings.  I managed to persuade myself that since I was using up scrap it would be worth it.

First I made a model of a Daisy using Fimo modelling clay.  I made three different sizes.  This is the little one.  It has a flat back and shaped petals and centre on the front.  I wanted it to look as much as possible like the Daisies on the Daisy bracelet.

IMG_2261 IMG_2166


The principle of Delft Clay casting is simple. Using the fine sandy clay you make a two part mould which you then pour molten silver into.  I filled the first half of the rings with the clay. You need to over fill it to start with. As you can see the clay packs together into quite a solid lump. It also gets everywhere!

IMG_2262 IMG_2263


Then hammer the clay down into the ring to compact it and then scrape off the excess with a steel ruler. You are left with a fairly firm block of clay inside the ring.

IMG_2264 IMG_2265 IMG_2266

This created a smooth surface to embed the Fimo model in, flat side down. Push it so it is about 1/2 way into the clay.

IMG_2267

Then cover the surface with a small amount of talc and brush off the excess.

IMG_2268 IMG_2269

The next step is to put the second ring onto to the first one being careful to line up the index marks.

IMG_2270

This ring is now filled with clay, hammered down and the top scraped off.

IMG_2272 IMG_2273

Right in the middle of all this clay is the little Fimo Daisy.  By very gently easing the halves apart again the clay splits at the layer of talc and the daisy is revealed.  The indentation of the flower can be seen in one half  half of the mould. Delft Clay gives a relatively fine impression.

IMG_2274

After taking the daisy out, if I were to put the mould back together again I would have a void where the Daisy had been.  It’s this void that the molten silver fills to create the cast.  I need to make an access to this void to allow the silver in and the air out.  If the air can’t get out, the silver won’t flow in. You start by making the air holes.  I carved channels from the flat side of the daisy to the edge of the mould and then pushed a piece of wire through each channel to create a vent for the air to get out.

IMG_2275 IMG_2276 IMG_2277

Good. The air can get out but i now need to create a funnel to get the silver in!  I very carefully pushed a rod from the centre of the daisy to the other side of the clay to make a hole. You can see the air holes all the way round the edge.

IMG_2278 IMG_2279


Silver won’t pour through such a long narrow gap so I widened the space into a funnel shape using a penknife.  I then put the two halves back together matching up the index marks.  You can just see the top of the daisy through the funnel vent.

IMG_2280 IMG_2281

At this stage it must be said that all this is much trickier than it looks and I have only shown you one that looks good!  One slip with the penknife and it time to start again.

Now the mould is complete the next step is getting the silver ready.  I put scrap silver bits into a scorifier (what a wonderful word!) and then heated them up using my big blowtorch.  I created a little ‘kiln’ using fire blocks to keep the heat in and stop me setting fire to my whole bench.

IMG_2282 IMG_2283

When the silver is truly liquid and very hot it is simply poured into the mould.  OH NO! SIMPLE IS NOT THE DESCRIPTION TO USE! I lost count of the number of castings that didn’t work. It would appear that the funnel has to be shallow enough, the hole into the void has to be big enough, the silver has to be hot enough and, most importantly, you don’t ‘pour’ it, you ‘dump’ it in!  You have to pour and heat at the same time – no photo of this process as I needed both hands.

This picture shows the mould just after pouring.  You can see the smoke coming out of the air holes.  The flames are the oils in the clay burning off.  You can see the red hot scorifier in the background.

IMG_2285


Then, the moment of truth.  Open the mould and see what has happened. Phew, this one worked well enough although a couple of the petals appear not to have filled completely.

IMG_2286 IMG_2287

Knock the daisy out of the mould and give it a wash.  The clay can be reused. You can see the silver that remained in the funnel protruding out the back as a big wedge shape, the ‘sprue’, that will need to be sawn off.

It was a bit of a mission to saw off the sprue at it was at least 4mm thick.

IMG_2288 IMG_2289

The Daisy then needed cleaning up with saw and file before it was ready to have the stalk added. You can see where the molten silver has pushed into the air channels I made. They’ve made little knobbly bits that need filing off.

IMG_2290


And on to the next, and the next, and the next!


DRUSY SUITE

All finished and ready to go.

This is  an earring and necklace collection for a special person.  She chose the stones a while ago but will have to wait for Christmas to get them.

Drusy’s are strange stones with a crystalline face and a flat back.  They are normally treated with a mineral of some kind – in this case titanium which gives the lovely purple finish.

There are two ovals and one teardrop shape.  The ovals are for earrings and the teardrop is for a matching pendant.

2013 Jewellery 63802013 Jewellery 6395IMG_1763

Mounting these is going to be a challenge.  I’ve never set Drusy before and this will be a bit of an experiment.  Unlike other cabochons there is no smooth edge to bend a bezel over.  The  surface is covered with tiny crystals.  I could make a claw setting but I’m not sure that I will like the effect.  I’m going to try and make a bezel setting but will have to shape the bezels to fit over the rough edges of the crystals.  Nothing ventured, nothing gained, so let’s just do it.

First make the bezels.  Cut the 0.3mm silver to length and wide enough to give me plenty to play with.

IMG_1764

Then bend it round and join the ends together.  It has to be a tight fit with no gaps.  The best way to check this is to hold it against the light.  I can see no light!

IMG_1770

That’s fine – no gaps.

Then paint the whole thing with flux and sit it on a pallion (tiny snip) of solder.  Aplly heat and when the solder flows into the joint, it’s done.  Repeat with the one for the other oval.

IMG_1765IMG_1766

They will both need pickling in sulphuric acid to remove copper oxide and shape them to fit.  One was ok but the second one was far too big.  You can see between the stone and the bezel.  I needed to reduce the size and then it fitted fine.

IMG_1775IMG_1772

Then file the base flat and check I can get the base out of my 0.3mm sheet – phew just enough!

IMG_1773

Flux the base and put pallions of solder around the bezel to solder the two together.  In the photo you can see the tiny chips of solder.  As I heat it I will make sure I snuggle them right up to the bezel so that a clean line of solder runs all the way through.

IMG_1774

On to making the bezel for the pendant.  This is a much trickier shape but the same principles apply.  I formed the bezel around the stone, marked it and then cut it.

IMG_1767IMG_1768.

That will have to do for now – got a bit distracted this weekend.

IMG_1792

Ok. Back to work. Returning to the earrings.  I soldered the bezel to the base and then snipped the edge of the base off with shears.  I could have sawn it but it was thin enough to shear and shearing is a lot faster.

IMG_1827

I have a real problem with making the bezel fit over the stones.  The top surface of the stone is so uneven and I want to retain the crystalline look.  I just don’t think I can successfully push a bezel over.  Look at the stone from the side and you will see what I mean.

IMG_1828 IMG_1829

After much tea and puzzling, I am going for a combined bezel and claw setting.  I filed down the side of the bezel so it is slightly narrower that the stone.  I polished it up a bit so that I wouldn’t need to do too much more one the claws are fitted.

IMG_1830 IMG_1831

After much inspecting I filed grooves in the bezel where there were dips in the crystals.   I need to solder wire to the side of the bezel so I can push the end of the wire over the stone in the dips created by gaps in the crystals.  The claws won’t be evenly spaced.

IMG_1832

Making the bezel/claw assembly was tricky.  I bent the wire into two ‘U’ shapes and held them in  place using a soft soldering block that I could push the ends into.  I decided to solder the ear-post in place at the same time to minimise heating. Theis picture shows the assembly ready for soldering.

IMG_1834

I cut the ‘U’ bends off the assembly and then practice fitted the stone.

IMG_1835 IMG_1836

After filling and sanding the bottom of the claws to make them look nice I shaped the tops into little spikes and polished it up.  I did take the dental floss out. Looking good!

IMG_1837

On to the Necklace.  Having formed the bezel I marked out where I wanted it to go on a base place.  I then stamped my makers mark on the back (I forget to do this with the earring – Ooops!

IMG_1838 IMG_1839

Solder the bezel onto the base place and then cut the bezel down to size.  This stone has clean edges to push the bezel over so I won’t need to make claws.

IMG_1840 IMG_1841

Good, the stone fits.  Er…actually it fits too well, can’t get it out, tore the dental floss.  Bother.  Had to drill a hole in the back and push it out!

IMG_1842

I wanted to make the pendant more interesting than just a simple bezel stetting so I twisted a length of 0.5mm wire to make a rope and then wound it round the bezel.  I formed the top into a loop to make the bail for the necklace.  This was then soldered in place and then pickled. If you look carefully you can see the strategically positioned hole in the back.

IMG_1843IMG_1844


After soldering it I cut out a neat shape on the back to mask the hole I had to drill to get the stone out.  I polished itt and then popped it in the ultrasonic cleaner to get the polish out of the nooks and crannies.  You can see the cloud go black polish escaping into the soapy water.

IMG_1847  IMG_1849

That done it was time to put the stone in.  Why do I always get so nervous at this stage? It looks good to me!


IMG_1852

Back to the other earring.  This stone is much more difficult than the first one.  It has one side that is very smooth and one side that is crystalline.  This is going to be a really bespoke setting!


IMG_1854

I made the setting the same way as the first one but only put claws on the side that has the crystals.  The bezel needed a really wavy edge.

IMG_1853

Bit of a pig to solder but eventually holding it all together with binding wire worked.

IMG_1855

After soldering I gave it a good clean under the tap with an electric toothbrush – not the one I use for my teeth I hasten to add.


IMG_1857

Phew. It fits. Just need to cut the claws to length and push them over.

IMG_1856      IMG_1850


And there we are.  One Drusy earring and necklace suite for a special person.

IMG_1879


Little keys for Jo – finished article.

A bunch of 3 keys represents the keys to the doors of Health, Wealth and Love.  I reckon this person could do with at least one of them, and you can’t have enough of a good thing so I did all three!

IMG_1346 IMG_1347

Start by forming square wire on a set of ring making pliers and slice through with the saw to get 3 Jump rings

IMG_1337

The rings were then soldered shut and squeezed with pliers to make ovals.

IMG_1338 IMG_1339

I cut the shanks from round wire, filed the ends straight and soldered them onto the ovals.

IMG_1340 IMG_1341

Then I sawed out tiny key ends from sheet and soldered them onto the shafts. I made a keyring out of 1mm wire.

IMG_1342 IMG_1343

I pre-polished the keys, stamped them with my maker’s mark, slipped them on the keyring and soldered it shut.

IMG_1344

All that’s left now is to polish them up in the tumbler and fit a chain.  Will post the finished set after they have been given to someone!

And here they are –

IMG_1347

Pendant with a Rough Boulder Opal

This is a little Boulder Opal pendant I made the other day.  The opal is still very rough with lots of matrix showing through it.  I made a silver mask to cover a large splurge of matrix and form a cap at the top.  Then took some wire right through the opal from the mask to fashion into a claw to hold the stone.

I like the effect al though it was VERY difficult to photograph!

Front view

2013 Jewellery 7493

Rear view showing the claw going through the opal and wrapping round to the front.  You can really see how rough the opal is from the back.


2013 Jewellery 7494

Smoky Quartz pendant

Starting a new project this week. The idea is to set Sarah’s large Smokey Quartz from the Himalayas into a necklace
IMG_0954
This is a 20mm stone, its heavy and quite fragile. The culet (pointy bit at the back)needs to be protected and Sarah wants a dramatic surround that will make quite a large pendant

I’m going to make a prototype in copper before I commit myself to silver.  First cut out a daisy shape.

IMG_0939

Then squish the petals together, tight!  This technique is called fold-forming and is fun to do.

IMG_0941

I then hammer round the open edges of the fold.  Hammering spreads the metal at the open edge which has the effect curving the fold itself.  When its been hammered, start opening out the petals.  This part is a bit like opening a surprise present, you’re never absolutely certain what you’re going to get.  I like it!

IMG_0942  IMG_0944

I then made a ring of wire that matched the size of the stone IMG_0948

and added some ‘tags which I can bend over the stone to hold it in place.  IMG_0955

This will eventually be soldered onto the petals and the stone set in the centre.

IMG_0949 IMG_0950

The whole thing balanced together and the stone gently popped into the setting.  I quite like the overall effect.  Looks like some kind of exotic flower.  Quite appropriate for a Himalayan stone.

31st May

Had a small problem with the bezel – turned out to be too flimsy and broke

IMG_0985

so I needed to make a new one.  This time I made it more substantial.  I made a ring that exactly fitted the diameter of the stone and then made an extra large bezel tube for it.

IMG_0986

I soldered the ring inside the tube and cut out legs or ‘stamens that would descend into the flower to hold it in place

IMG_0986 IMG_0987IMG_0988

Much filing and fiddling later the bezel is soldered in place.  I love the colours of newly heated copper

IMG_0989

but polished it up anyway and popped the stone in place.  I’ll make petal shapes around the top of the bezel to mimic the inner petals of the flower

IMG_0990IMG_0992

Someone asked me where the inspiration came from for this, Here it is, the beautiful Aquilegia or Colombine that self seed all over my garden

IMG_0996 IMG_0995IMG_0994

I’m happy with the overall plan. I’ve worked out where the ring should go to hang it but I’m also thinking of adding a brooch pin so it could do ‘double duty’  Thoughts anyone?

MOVING ON THE SILVER VERSION.  Deep breaths!

Cut out the shape in 1mm sheet

IMG_0998

Use the vice ( the big one this time ‘cos I broke the small one folding the copper!) to fold the petals

IMG_1001 IMG_1002

Hammer the open edge of the petals to get the curve, bit more needed I think.

IMG_1004

Open it out.  This was a real struggle, didn’t want to open out at all but brute force prevailed in the end.  So pretty.  I tidied up the rough edges and made the base a gentle curve.

IMG_1017

Make the bezel the same way as last time and bend the ‘legs’ to fit into the flower.  This is trial and error.  Due to the freeform nature of the flower each leg needs to be a different shape. I then shaped the top of the bezel into ‘petals’ that will fold over the stone.

IMG_1018 IMG_1019

Bezel finished, washed and cleaned.  All that’s left now is to solder the two together.  Oh such simple words – this is going to be a nightmare.  Loads of joints, I’ll need to wire it together and then just go for it!

IMG_1020


Well,here it is.  All done.  A Silver pendant with a Smoky Quartz stone set in the centre.

2013 Jewellery 6348

Here’s the back view.  I added a detachable brooch pin to give more versatility

2013 Jewellery 6347 2013 Jewellery 6346


Sarah was very happy with it and so am I.  Would love some feed back

Making Silver Ball Pendant

I started by cutting out 2 discs of silver sheet

silverball1


Domed them into hemispheres and made sure they fitted together

silverball2


I marked the pattern I wanted on the sphere and drilled holes so I could get the saw in

silverball3

Sawing out the pattern


silverball4

1st hemisphere nearly done. Solder a rim around the inside so that the 2 halves will fit together

silverball5


Fit the two halves together temporarily with superglue. (Unstick the superglue from fingers!)

silverball6


Give it a really good clean and polish then cover it in poster paint


silverball7

Draw the design on with pencil so both sides join up.

silverball8

Scratch through the pencil line to mark the silver underneath

silverball9

Scratch over the areas to be cut out. Wash the paint off and then soak in nail varnish remover to get rid of the superglue and split it in 2 again

silverball10


Drill holes in the spaces to fit the saw through

silverball11


2nd half cut out


silverball12


Start piercing out the edges. Tricky cos it wants to deform and I want it to stay round


silverball13


Phew, both cut out. With a bit of careful filing they fit together. Yay!

silverball14


Wire it together. Then wire it again, then wire it again cos it keeps slipping. Then add flux and position the solder. Repeat whole process twice due to it slipping. Grrr


silverball15


Solder it together.

silverball16


Whooo hoo. Joined! Pickled and washed.

silverball17

Make the bar to go through the centre

silverball18


Solder a silver bead on the end


silverball19

Suspend in Liver of sulphur solution


silverball20


….and it’s all turned black. At this point decide the ball and ring are too big. Cut them off, redo smaller, Liver of Sulphur -again!


silverball21


Polish the black pagination off the outside and, voila! Done!!

silverball22